The Process:
1. Preparing the catch
Fresh fish is the easiest to work with as the fish is usually firm and with less leakage of fluids. Frozen fish can be used, however, particular attention will need to be placed on defrosting the fish thoroughly, and drying off not only the exterior of the fish but also any orifice that may leak fluids and ruin a print.
To prepare a fish for printing, wash the fish using a sponge and water. Table salt or lemon juice can be used to help aid in removing slime from the body of the fish. Make sure to rinse out the gill area as this is often a place where fish fluids will leak onto the paper.
Next, dry the fish using paper towels. Don't forget to pull out fins and dry repeatedly. Paper towels can be stuffed in the gill area and anus, to prevent fluids from contaminating the print. A fish that has been in the refrigerator or cooler may need time to warm up especially in humid locations as it will form condensation which will ruin a print. I do work quickly with the fish to keep it as fresh as possible, especially if the fish will be someone's dinner.
This process can be a few minutes for small fish, to a few hours for larger fish.
2. Inking the fish
Place the fish on a piece of newspaper or on a rag that will absorb any fluids that may leak from the fish. For smaller fish. When I'm camping, a big cooler works as a good table. For larger fish like ulua, ono, mahi, or sailfish, you may not have a table big enough. Lay a sheet or tarp on the floor. Tarps are good because they are easy to clean.
I use india ink or acylic paint, which is non-toxic, therefore the fish can still be consumed after printing. Sumi ink is often commonly used for gyotaku prints. Please note that some sumi inks are not toxic free, if that is used, the fish should not be consumed. The india ink or paint I use is black in color, which is what I prefer for my style of painting as it gives contrast to the brilliant colors which I believe really brings the fish to life!
Once the fish is dry, apply the ink or paint using a brush. Avoid applying too much ink which will cause blotching on the print. Make sure to cover the entire area that will be printed. For larger fish, a big paintbrush, like those used for painting walls, save on time, but do hold a lot of ink, so be careful not to over
Supplies:
1. Fish
2. Sumi, India Ink, paint
3. Shoji Paper
4. Paint Brushes
5. Paper Towels
6. Newspaper
7. Watercolor or Acrylic Paint
8. Container for ink
9. Containers for paint
10. Old cotton T-shirt
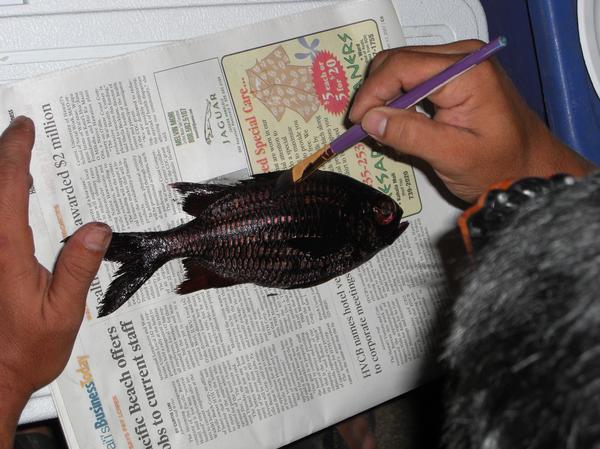
Inking the fish with a paintbrush.
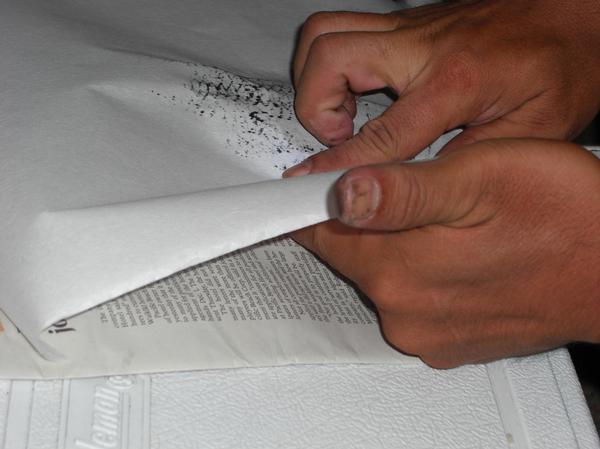
Apply rice paper and rub fish.
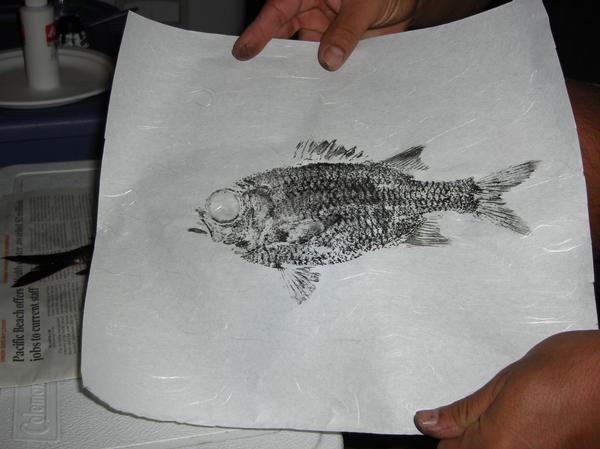
Mirrored image print.
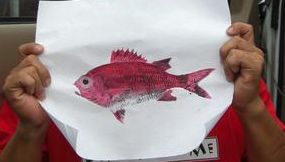
Painted print, ready for framing.
How To Gyotaku:
The following pictures were taken while camping on the South side of the Island of Hawaii. This Menpachi was just caught. Note Takeo using a headlamp while printing.
ink the fish. I have brushes that are dedicated to the inking process as it's tough to get all the black out of a brush once it's used for inking. After the fish is inked, use a soft cotton shirt or rag to blot off excess ink, this is a key step to a quality print. Avoid wrinkles in your shirt or rag as this will form lines on the inked fish, which will be transferred to the final print. Blotting will take experience and practice to know just the amount of ink needed for a good print. Don't get frustrated. Practice with small fish and do as many prints as your patience and time allows.
Use a piece of paper towel or a q-tip to clean off the ink on the eye since you want the eye portion to be white on the print, this will be painted in later.
3. Shoji Paper
There are many different types of shoji paper. Finding the one that works best is challenging. Some paper are thin, which makes it easy to work with, however, some thin paper are very brittle, especially when wet. Thicker paper is more durable, but harder to work with. I like using kozo paper which is somewhat translucent, which helps with making a clean print as you can see where the ink is transferring. I also use papers that have a blend of kozo. These papers tend to bleed a bit more.
Shoji paper that is called unryu, which means cloud dragon, have fibers in them that resemble clouds. This type of paper in my opinion gives the art piece a more Asian flare.
Shoji paper comes in rolls, often sold for shoji screens or shoji doors. Rice paper is also sold in cut pieces. The paper from rolls often have a curl to them. To help relax the paper, I spritz the paper with a spray bottle then lay on a flat table to dry. This makes it much easier to work with versus a piece of paper that wants to curl on you while printing.
Cut a few pieces of paper that is large enough to fit your fish print. I tend to cut the pieces to common size frames such as 11"x14", 16"x20", 20"x24", and 24"x36". Standard size frames are much more affordable than having a custom frame made, so plan ahead.
4. Fish Rubbing
Lay the piece of rice paper on the fish. For larger fish, find a friend who can lend you a hand with laying the paper evenly and centered. Once the paper has made contact with the fish, avoid moving the paper around as you will get a double print. Double prints can be extremely frustrating, but will teach you discipline in your printing techniques. Take your time, it's not a race. Rub the paper gently. Use your fingertips for smaller fish or for areas that form the outline of the fish. I like to rub in a pattern, depending on what fish I'm printing. It's important to make sure the entire surface of the inked fish is printed so that you don't end up with a partial print. Reach under the paper to open fins that need to be printed, always paying attention to keeping the paper in position so that all lines of the fish match. It will take a lot of practice to get a good fish print, but in time, you'll see your prints getting better and better. Take the time to learn this step. Use mistake prints for painting practice. Nothing is a waste, even mistakes teach you something.
Printing large fish is very tricky as a flat piece of paper cannot conform to the curves of a fish, especially one that has a large girth. This is where your creativity, patience, and technique will come into play.
4. Painting the Print
Once you have a decent print, paint it up with watercolor or acrylic, it's a matter of preference. I started off using cheaper watercolor paints, but find that artist quality paints are just easier to work with as they blend well, have a wide assortment of colors, and are more vivid, which helps bring the print to life. It's good to have a wide selection of colors which means less mixing of paints to get the desired color. Paints can be watered down for lighter colors, however, watered down paints tend to bleed more on rice paper.
I always have rolls of paper towels handy and a bottle of water for brush cleaning. I also have numerous containers or dishes to hold my paints. I particularly like ceramic dishes used for shoyu (soy sauce) and wasabi when eating sushi and sashimi. These dishes can be found for a couple dollars and are easy to wash, even if left for hours with paint in them.
As for brushes, I initially started off with cheap brushes, but have found that more expensive brushes are just easier to work with and lessens the frustrations. Brushes are an important investment and will last a long time if taken cared of.
5. Mounting
Prints can be mounted using various techniques. Most of my prints are mounted to an acid free foam board using rice paste, the same adhesive used in mounting rice paper when building shoji screens. The advantage of using rice paste is that the print can be removed if moistened. Many frame shops have been using dry mounting techniques for gyotaku prints. The advantage of dry mounting is that it eliminates waves in the paper. A disadvantage is that dry mounting is permanent. Another disadvantage is that dry mounting can create wrinkles in the paper, especially paper that is not totally uniform because of expanding and shrinking due to painting.
6. Matting
I use acid free mats which don't yellow like cheaper mats. Cheaper mats will look good initially, but in time, will yellow, which in my opinion is an eyesore. Mats can be custom cut by frame shops and can be quite expensive, about $25 for a 24"x36". Double mats add to the depth of a art piece but once again, will add to the cost of your final product. Mats come in various colors which you can select depending on the color of the print, the frame, and the room where the art piece will be displayed. I custom cut each mat, by hand, made specifically for each piece.
Click here to add text.